This is an old revision of the document!
 Esta página no está completamente traducida, aún. Por favor, contribuye a su traducción.
(Elimina este párrafo una vez la traducción esté completa)
Networking in Cloudstack
Introduction
When a network is created inside Cloudstack two things are created: a vlan is created to isolate this network from the other user's and a virtual router is also created to be the gateway to other networks, to be a firewall and to offer the nat service.
The external IP address of the router (which is in the 172.16.244.0/255 range) is reachable from any other ip address belonging to the CiTIUS network. Connecting to this ip address the user can reach all the VM created inside that network using NAT. Each network created will have a different IP address.
All VM receive their network configuration dinamically using DHCP without user intervention.
By default the virtual router is configured to block all communication between the external network and the user network. To open ports in the firewall and/or configure nat to allow VMs to reach the exterior networks you'll have to use the web interface as explained further ahead.
An example of two different user networks:
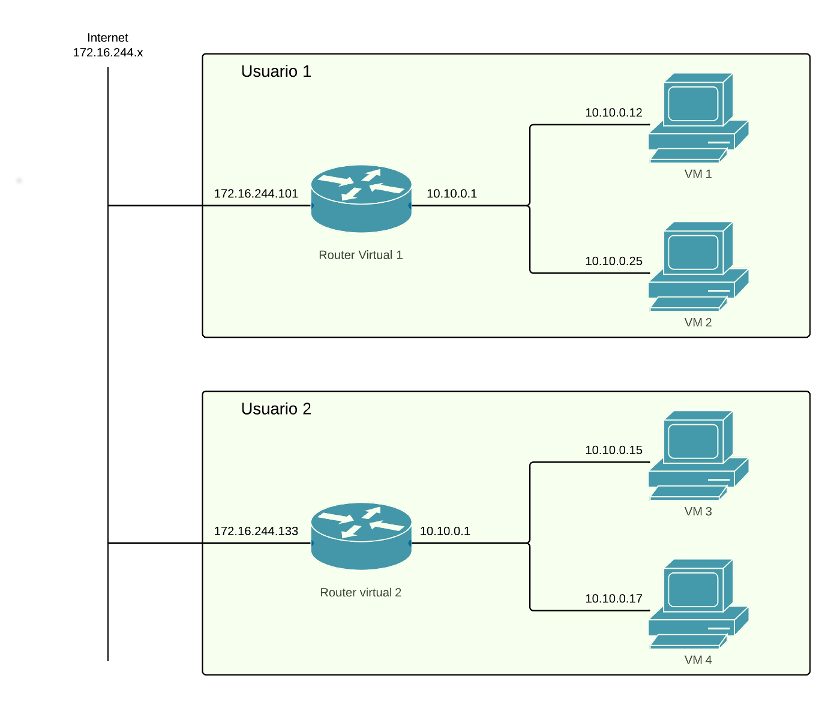
As you can see in the image user1 has created a network with two virtual machines, VM 1 and 2. This two VM can communicate between them because they are in the same network. Even though user 1 and user 2 networks have the same address range in their respective networks they belong to different vlans so are completely isolated between them. They can reach the external networks using the gateway of virtual router 1. This router has two network interfaces, one connected to the user network (10.0.0.1) and other to the CiTIUS network (172.16.244.101). User must connect to 172.16.244.101 to access any service offered by his virtual machines.
What determines to which service of which VM you connect to when accessing that IP address is whatever is configured in the NAT service of the virtual router. For example, supposing both VM1 and VM2 have web servers accessible at port 80 and that the router has the following nat rules configured:
Port 180 → port 80 of VM1
Port 280 → puerto 80 of VM2
then to access the first web page you should use 172.16.244.101:180 and to access the second 172.16.244.101:280.
Configuration
Configuration of networks in Cloudstack is done choosing “Network” in the left column:
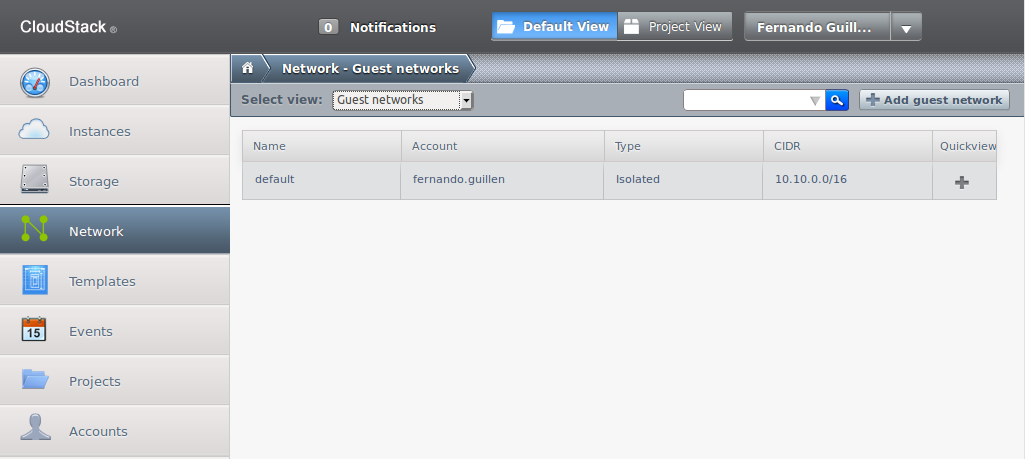
Here you'll see a list of the already created networks; in the previous example there is only one named “default”.
Create new networks
There are two ways of creating new networks, one automatic during the creation of a VM (recommended) and other manual by pressing button “Add guest network” located in the upper right part of the screen.
This will open a new window with a form to fill in the necessary data:
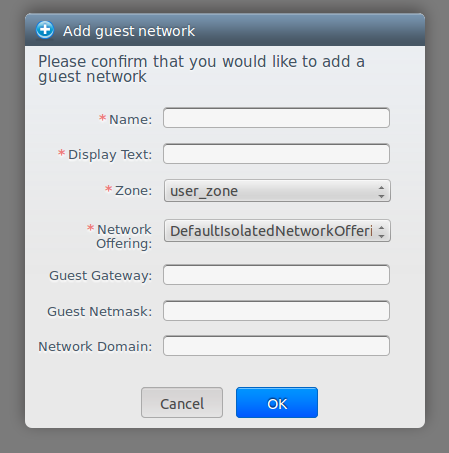
- Name: name of the network, Cloudstack does not use it, so choose something meaningful to you.
- Display text: Description, again only useful for the user.
- Zone: there is only one zone, leave it.
- Network offering: there is only one option, leave it.
- Guest gateway (optional): 10.10.0.1 by default, can be changed. It's the ip address of the internal network interface in the virtual router.
- Guest netmask (optional): network netmask.
- Network domain (optional): a domain name can be defined for the network.
Configure network
Choose a network and the following screen will appear:
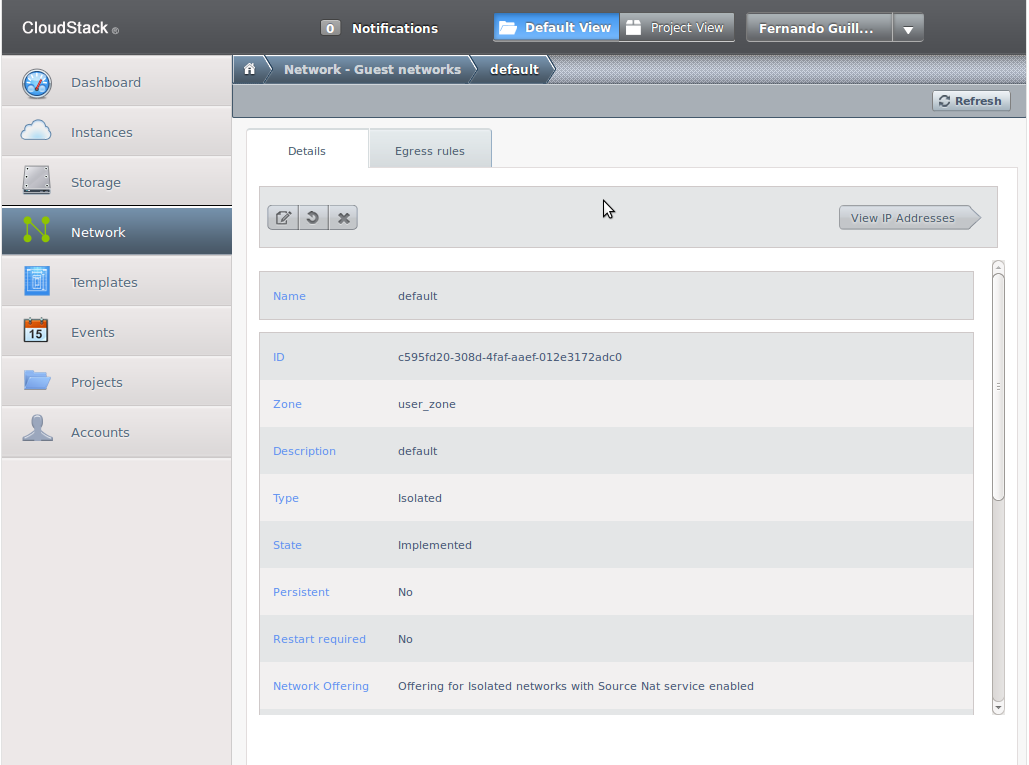
Here network two-way network traffic can be configured: from the VM to the outside and from the outside to the VM.
Configure access from the VM to the external network
By default the network firewall prevents any type of communication between the VM and the external network. To modify this configuration go to the “Egress rules” tab:

There a list with the current rules and a blank line for new ones appear. Rules work with implicit rejection which means that any traffic not explicitly allowed by a rule will be rejected. The simplest rule that can be added to allow all traffic from the VM to the exterior networks is:
| Source CIDR | 0.0.0.0/0 |
| Protocol | All |
CIDR 0.0.0.0/0 means any source and Protocol All means any port.
If less permissive rules are desired then put in the “Source CIDR” field the ip address of the host or network from which traffic is to be allowed and in the “Protocol”,“Start Port” and “Destination Port” fields the protocol and ports allowed.
Once the rule is created the “Add” button is substituted by a cross to allow its removal.
Configurar el tráfico desde el exterior hacia la VM
Al crear una red se inician dos servicios: cortafuegos y source nat. El cortafuegos por defecto no permite ningún tráfico entrante en la red, por lo que habrá que configurar reglas explicitas para cada puerto que queramos abierto en la red. El source nat hay que configurarlo para que cuando haya tráfico entrante en la red, este sea redirigido a la máquina virtual que nosotros queramos.
Para llegar hasta la pantalla de configuración hay que seleccionar el nombre de la red de entre la lista, pulsar el botón “View ip addresses” y ahí seleccionar la dirección ip de la red.
Ahí hay que pinchar en la pestaña “Configuration”, con lo que llegaremos a esta pantalla:
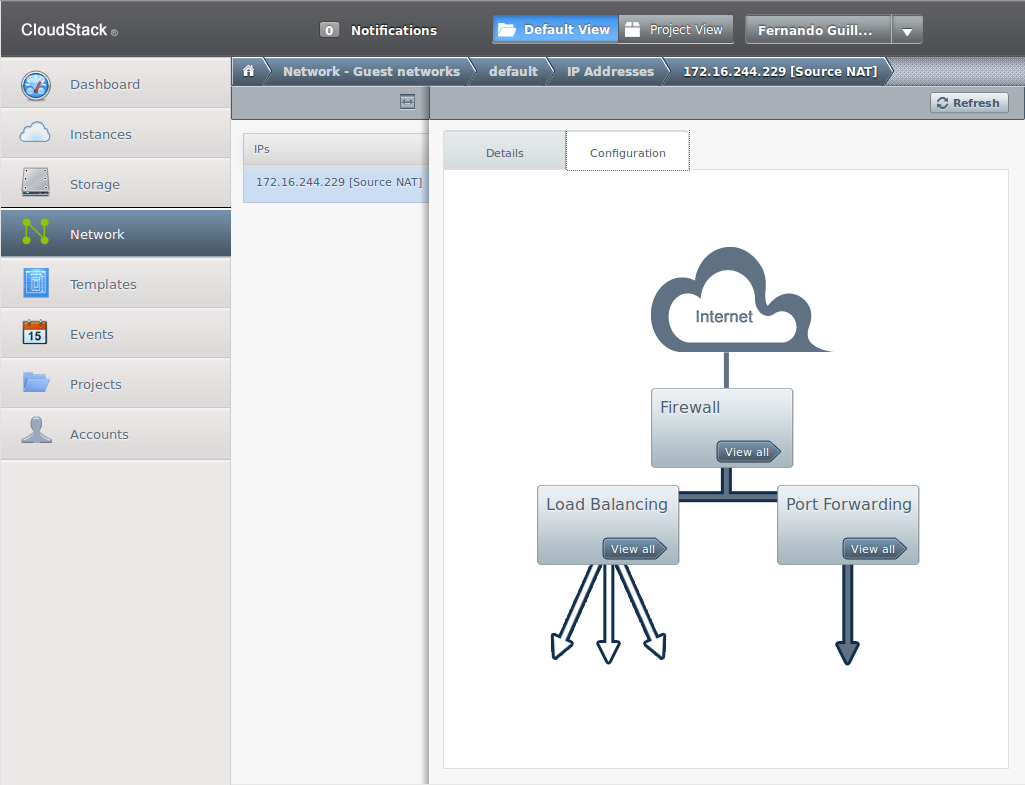
En el botón “Firewall” abrimos la pantalla de configuración del cortafuegos y en el botón “Port Forwarding” la de configuración del nat.
Configurar el cortafuegos
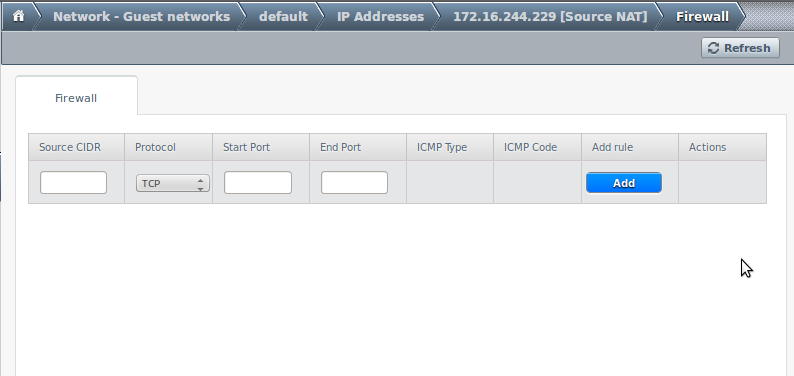
Aqui podemos abrir rangos de puertos de modo que sean accesibles desde la red externa:
- Source CIDR: define para qué direcciones de origen estará permitido el tráfico de esta regla. Se puede poner una red, un host o 0.0.0.0/0 para indicar cualquiera.
- Protocol: TCP, UDP o ICMP.
- Start y End Ports (solo para TCP y UDP): definen el rango de puertos en el que se permitirá el paso. Para especificar un único puerto poner el mismo número en ambos.
- ICMP Type y ICMP Code (solo para ICMP): definen el tipo de mensaje ICMP que se permitirá.
- Add rule: botón que añade la regla a la lista. Una vez añadida es sustituido por un botón para borrarla.
Configurar el nat
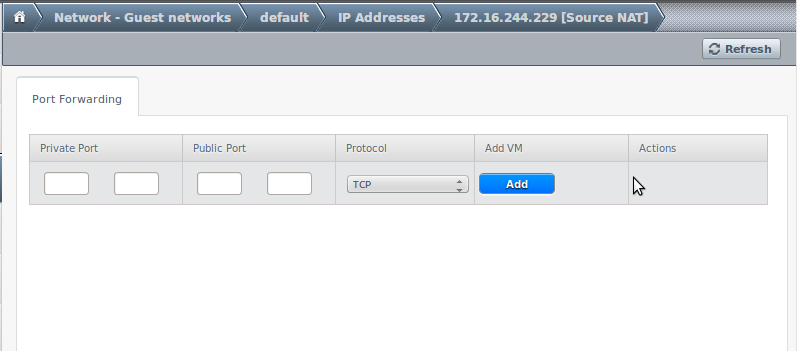
Aqui redirigimos el tráfico que llega a la interfaz externa del router hacia una máquina virtual concreta en función del puerto de destino:
- Private port: puerto de la máquina virtual al que queremos que se conecte.
- Public port: puerto del router virtual que usaremos para conectarnos a la máquina virtual.
- Protocol: especifica si el puerto es TCP o UDP.
- Add VM: aquí se selecciona la máquina virtual a la que irá dirigida la conexión.