Gitlab - GIT repository and continuous integration
Service description
GitLab server, a tool to manage GIT repositories easily, very similar to GitHub.
It has GitLab CI activated with a Docker runner (and the possibility to add more runners) and Gitlab Pages.
Activation
All CITIUS users can use this service automatically.
User manual
GitLab access and first steps
Go to https://gitlab.citius.usc.es/ and use your CITIUS credentials in the LDAP tab.
Once logged in create a new project. Then the steps needed to initialize the repository will be displayed.
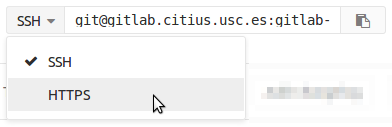
Remember that if you choose SSH as the access method (default option), you'll only be capable of doing so from inside the CITIUS network or using the VPN and you'll need to upload a public key in the preferences section. Adding the public key is a simple task and GitLab instructs you on the procedure. This is the recommended choice when working inside the building.
HTTPS access on the other hand works from everywhere and only a valid username and password are needed.
GitLab CI
From version 8.0 onwards Gitlab CI is integrated with Gitlab. To start it is enough to create a file named .gitlab-ci.yml following the Gitlab CI guide.
Gitlab Pages
Pages in Gitlab Pages are served from a pages.citius.usc.es subdomain (with an alias in citiususc.io), and are created by a Gitlab CI job. There is a basic guide about Gitlab Pages in https://pages.citius.usc.es/ and more information available in Gitlab Pages hosting
Project creation by groups
Gitlab projects can be created by a user or by a group. If the project implies collaboration with other users or if it may be transferred to other user at some point then it is advisable to create the project in a group. To do so push the Create a group button inside the Groups page.
Big files (git lfs)
Files bigger than 100MB shouldn't be uploaded to the git repository the same way as the others but using git-lfs:
- Install the
git-lfsclient, available in thegit-lfspackage in the CITIUS Ubuntu 14.04 or here for other distros. - Inside the repository directory install LFS:
git lfs install - Specify which files are going to be managed with LFS (wildcards can be used):
git lfs add "*.ova" - Add the files to commits as usual:
git add file.ova; git commit -m “Added big file” - LFS only works using HTTPS, not SSH. If using remote through SSH, then HTTPS has to be added with a different name before doing push, for example:
git remote add origin-https https://gitlab.citius.usc.es/grupo/proxecto.git - Finally make a push to remote HTTPS:
git push origin-https master
To clone the repository there are also additional steps:
- Do the clone as usual using HTTPS:
git clone https://gitlab.citius.usc.es/grupo/proxecto.git - Change the repository's directory and get the files from the LFS:
git lfs fetch
Problems and frequent questions
When making a push the following error appears: "error: RPC failed; result=22, HTTP code = 411"
If you see error HTTP code = 411, you need to configure the git command to increase the HTTP buffer size:
git config --global http.postBuffer 524288000 # permite ata 500MB
If revciving HTTP code = 413, it is because push is too big. Server accepts HTTP pushes to 70MB, more than that will produce an error. If you need to do bigger pushes you will have to use SSH with a pair of keys instead of HTTP.
When cloning the repository I see the following error: "Agent admitted failure to sign using the key."
If the SSH key is correctly configured in the server but you have just created it and never tried to use it, then execute the following command to add it to the local authentication agent:
ssh-add